Working with Web Services in SharePoint Designer 2013 Workflow

In this post I will use “Call HTTP web service” action to get a collection of items from a list, and then will log the number of items with it’s title. 
Following is the sample SharePoint List “Call HTTP Webservice Online” I created for this Demo –

Now let’s create a Site workflow as I don’t need this workflow to be fired when items are created or modified in the list

I split this post into 4 different workflow stages: Initialization, Webservice Call, Webservice Response and Finished.

Stage 1: Initialization: 

The following variables get initialized at this stage:

  1. WebserviceURL workflow variable of type ‘string’
  2. Index workflow variable of type Integer & set it to 0. 
  3. Add a Dictionary variable (Build a Dictionary action), call it requestHeaders and initialize it with “Accept” and “Content-Type” entries are of the String type and they both contain the value “application/json;odata=verbose”.

Stage 2: Webservice Call

  1. Add a Call as HTTP Web Service action and set its properties.
  2. Set workflow variable “WebserviceURL” as Web Service URL and Set HTTP method as “GET“.
  3. Response content will go to a new variable called responseContent.(type – Dictionary).
  4. Response headers will go to a new variable called responseHeaders.(type – Dictionary).
  5. Response code will go to a new variable called responseCode.(type – Dictionary ).

Then we set the request headers to be the requestHeaders variable we created just now, by clicking on the properties for the Call on HTTP Web Service action:

Stage 3: Webservice Response

  1. Add a Get an Item from a Dictionary action, set the item as d/results, the source variable reponseContent and the output to a new variable of type Dictionary called List.
  2. Then count items from this list variable using a Count Items in Dictionary action and store the result in a new Integer variable called TotalListItem. This variable will tell us how many times we have to loop.
  3. Now, create a new Integer variable called index and set it to 0 (Set Workflow Variable), this will be the loop index
  4. Add a loop (Loop n Times), and set the loop variable to TotalListItem variable.
  • Inside the loop, get value d/results ([%Variable: index %]) using a Get an Item from a Dictionary action from responseContent and store it in a new Dictionary variable called CurrentItem.
  • Get some fields (Get an Item from a Dictionary) from the CurrentItem variable, such as Title and store them in appropriate variables and then perform any action, like logging its value
  • It’s time to increment the loop counter: add a Do Calculation action and in it increment the index variable into a new Integer variable called IncrementCounter.
  • Then set the index variable to be the IncrementCounter(Set Workflow Variable).

Stage 4: Finished

  1. Finally exit the loop and set the workflow status to Finished.
  2. At the end of the stage, select go to End of Workflow.

Let’s run the workflow –

  1. Go to site content
  2. Click Site Workflow
  3. Select Appropriate workflow
  4. Click it
  5. Workflow started.

Result –

I hope you find this post helpful 🙂

Clear SharePoint Designer 2013 Cache

Sometimes SharePoint Designer 2013 gets confused. One way to get it back on track is to reset it’s cache. Clearing the cache will remove any of your past connection history as well provide you a “clean slate” to work from.  The cache is not even cleared after doing a reinstall, so this is the only way to clear it. SharePoint Designer has a little habit of caching files, including say the XML/XSLT, JS and CSS you might be working with on your site.

  1. Close SharePoint Designer if it is open
  2. Open Windows Explorer, Click the address bar and Paste “%USERPROFILE%\AppData\Local\Microsoft\WebsiteCache” and delete everything within this location.
  3. Open Windows Explorer, Click the address bar and Paste “%APPDATA%\Microsoft\Web Server Extensions\Cache” and delete everything in this location.
  4. Go to SPD2013 options –> General –> Application Options –> Uncheck the “Cache site data across SharePoint Designer sessions”

1

2

Relaunch SDP. Easy!

Character Count for Multi-line Text box in SharePoint List Forms

While working with SharePoint, you might have come across a scenarios where you need to count the character for Multi-line text-box in SharePoint list form. In this post I am going to implement Character Counter for Multi-line Text box using JQuery.

To outline the solution please follow the below steps –

Step 1 : Open your List new/edit form using SP Designer.

1

Step 2: Add tag under your multi line text filed description in the New form.

2

Step 3: Add the below code in your New form. and download Jquery latest file.

5

Step 4: Save the form and refresh your page.

4

Thank you. 🙂
Quick Search in SharePoint List Using JQuery

In this post I am going to implement a quick search in SharePoint list using JQuery that allows you to search records in a list. It is useful in a situation where you don’t have SharePoint Search setup and just need a simple way of performing search operations in a SharePoint List.

To outline the solution please follow the below steps –

  • Download the latest JQuery file from Here
  • Create a Custom SharePoint list in which you would like to implement the search
  • Open the SharePoint Designer
  • Go to All Files-> Lists->Select the name of the list we just created
  • Paste the JQuery file (jquery-min.js) we just downloaded
  • Create a new JavaScript File-> Rename the file as “QuickSearch.js”
  • Open “AllItem.aspx” view and add the reference of both the JQuery file

    <script type=”text/javascript” src=” QuickSearch.js”>

    <script type=”text/javascript” src=”jquery-min.js”>

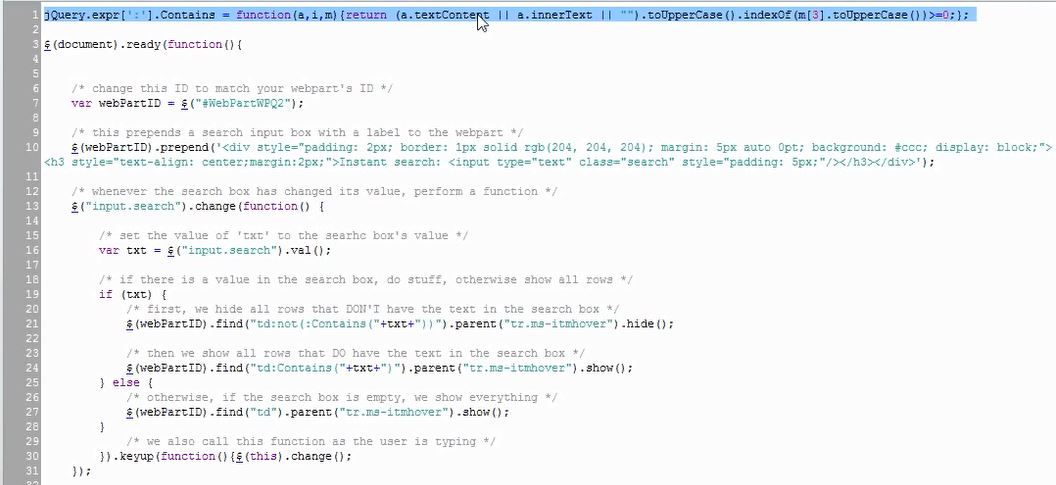
  • Now Edit the “QuickSearch.js” file, type below code and Save the file

$(document).ready(function(){

$(“input.search”).change(function() {

     var txt = $(“input.search”).val();

     if (txt) {

              $(“#WebPartWPQ1”).find(“tr.ms-itmhover:not(:Contains(“+txt+”))”).hide();

               $(“#WebPartWPQ1”).find(“tr.ms-itmhover:Contains(“+txt+”)”).show();

                   } else {

                    $(“#WebPartWPQ1”).find(“tr.ms-itmhover”).show();

                  }

           }).keyup(function(){$(this).change();

     });

});

<div style=”padding: 5px; border: 1px solid #cccccc; width: 60%; margin: 10px auto 0pt; background: none repeat scroll 0% 0% #efefef; display: block;”>

<h3 style=”text-align: center;”>TYPE HERE : <input class=”search” style=”padding: 10px;” type=”text”/>

quicksearch2

Explanation : We would like to start our function anytime the search input text is changed. Once it’s changed, it sets the value of a variable we have called “txt”.

Here we have an IF statement that just checks if there is indeed something in the search box, ELSE everything goes back to normal. If there is something inside the search input box, we are going to do two things. First, we’ll find any row that does NOT contain the string, and we’ll hide that row. Then we’ll find any row that DOES contain that string, and we’ll show that row. Finally, we chain a “keyup” function to the change function so that as we type everything is happening all together.

And last but not least, we created a simple search input box with a class of “search”.

Now open the SharePoint List All Item view in internet explorer and If you have done everything correctly then it will filter the items on the basis of your inputs.

quicksearch

PS : You’ll have to change the target WebPart ID it’s searching in and replace it with your current Web Part ID and its row class.

I hope you find this post useful.

Add an Attachment Field in SharePoint 2013 List Form

There are many instances where your customer would like to have Attach file option in the form itself instead of OOB option available in ribbon.Below I will show you how to have the “Browse” and “Upload” features directly on the form.

Open up SharePoint Designer 2013 and navigate to your list. Then click on the ASPX file you would like to edit under the “Forms” section.

In the code view of the form, place the below code to insert the Attachment Field
<tr>
<td rowspan=”2″ width=”200px” valign=”top” height=”25px”>
<b>Upload Files: </b> </td>
<td valign=”bottom” height=”25″ id=”attachmentsOnClient”>
<span dir=”ltr”>
<input type=”file” name=”fileupload0″ id=”onetidIOFile”
size=”60″ title=”Name”></input>
</span>
</td></tr>
<tr>
<td >
<input id=”attachOKbutton” type=”BUTTON” onclick=’OkAttach()’
value=”Upload” />
<span id=”idSpace”></span></td></tr>

Now you can see the browse button to upload the files into SharePoint list item.

1

Thanks. !! 🙂
Promoted Results in SharePoint 2013/Office 365

In this post I will write about how to create promoted results in SP 2013/Office 365. In SharePoint 2010 we had best bets to promote a result to the top of the search result list by using keywords. this was the great way to highlight a specific item in the result list. Best bets in Share Point 2010 is changed to promoted results in SharePoint 2013/Office 365.

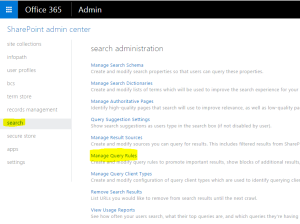
To create Promoted Results, First open SharePoint Admin Center, click on Search from the left navigation and then click on “Manage Query Rules” link

1

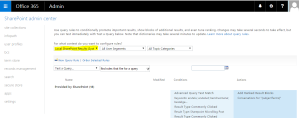
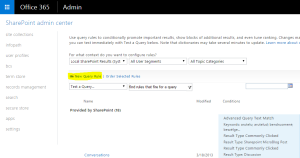
In Manage Query Rules window, select Local SharePoint Result from the drop down of context and click on New Query Rule

2

3

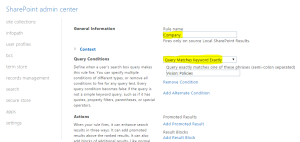
On the Add New Query Rule page, Enter the Rule name and on the Context section select “Query Matched Keyword Exactly, enter keywords in the text box separated by semicolon. For e.g. Kavita;Mishra

4

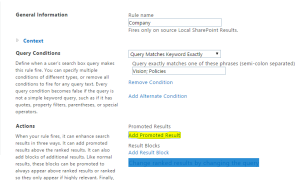
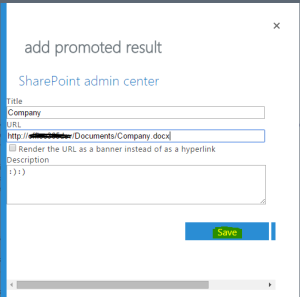
Click on the “Add Promoted Results” link under Actions section and enter Title,  URL and description and then hit Save button

5

6

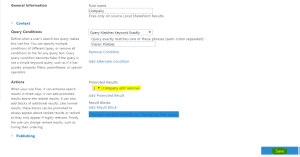
After completion of above details, click “Save” to save the Query Rule.

7

Now go to the search center. Type the word “Vision” or  “Policies”. The Company.docx would be displayed on top of the results with a tick mark

8

:):)

Create a Tabbed View in SharePoint 2013 using JQuery

While working with SharePoint, you might have come across a scenarios where you need to use the Tabbed View. In this post, I will share how to create a tabbed view for Multiple List Views in SharePoint 2013 (assuming that you have some SharePoint background) –

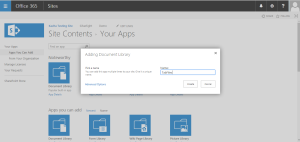
Step 1 : Create a Document Library (TabFiles) to store the required Jquery files

10.1

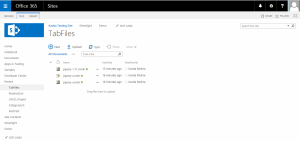
2. Upload below mention  js/css files in the Document Library (You can download these files from Here ).

  • jquery-ui.min.js
  • jquery-1.11.3.min.js
  • jquery-ui.min.css

10.2


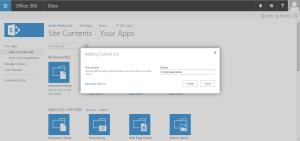
3. Now create the Custom list (Employee Details) to implement the Tabbed view –

10.3


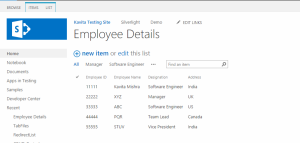
4. Add some columns (Employee ID, Employee Name, Designation and Address) and then items in the list –

10.5

5. Create the first list view as “Vice President” –

10.6

10.7


6. Filter the View on the basis of Designation as “Vice President” –

10.8

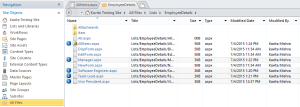
7. Now create three more views (for Manager, Team Lead and Software Engineer) designation same as we just created for “Vice President” (Change the name of the view and filter value to Manager/Team Lead/Software Engineer).

10.9

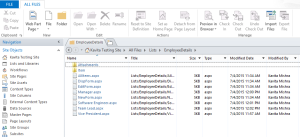
8. After Creating all the four views, Open site in SharePoint Designer.

10.11

9. Open “Employee Details” Custom list AllItem.aspx page in Advanced mode-

10.12

10. Add the reference of js and css file (Which we have already uploaded in the “TabFiles” Document Library) –

10.13

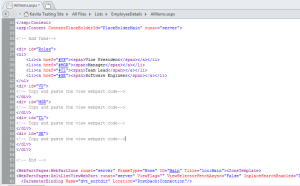
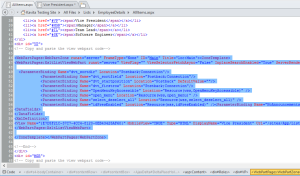
11. Add four Div Section (Vice President/Manager/Team Lead/ Software Engineer) for List Views

10.14

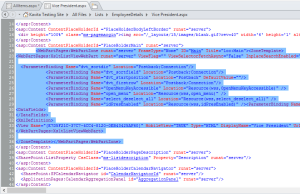
12. Open the List view file (VicePresident.aspx) in SharePoint Designer which we have just created and Cut the “WebpartZone” section and Paste it under “VP” Div section on AllItem.aspx page.

10.19

10.15

10.16


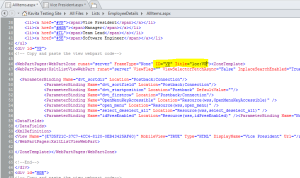
13. Change the WebpartZone ID to Unique name on the page-

10.17

14. Follow the same for remaining three views Manager/Team Lead/Software Engineer –

  • Cut The WebPartZone code from List View Page (Manager.aspx/ TeamLead.aspx/  SoftwareEngineer.aspx)
  • Paste it under each Div Section on AllItem.aspx page
  • Change the WebPartZone ID to Unique Name and save all the pages

10.19

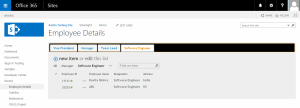
15. Now open the Employee Details List in internet explorer and you will see the Employee Details List AllItem View has Converted into Tabbed view 🙂

10.18

I hope you liked it, Thanks for reading the blog 🙂

Change Master Page Layout (from Seattle.master to Oslo.master) in SharePoint 2013


In this post I am going to cover “How to change Master Page Layout (from Seattle.master to Oslo.master) in SharePoint 2013.


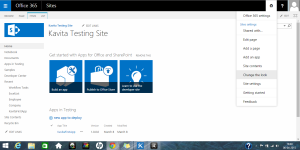
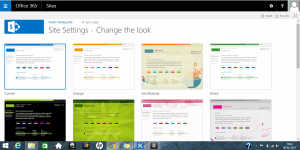
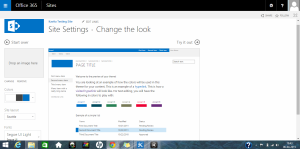
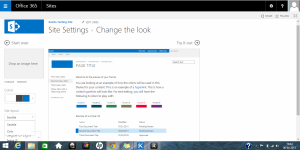
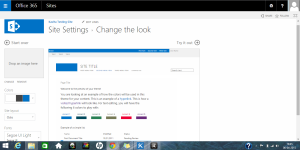
Go to Site Settings, click on “Change the Look” and then select the theme.

11

12


Now you can see “Site Layout” option on left side navigation, it allows you to pick a specific layout for your site, the default layout option is Seattle that provides “Global Navigation / Top Bar” and a “Quick Launch” side navigation to your site.

13


Change the site layout from Seattle to Oslo at left side navigation.

14


The Oslo provides left side navigation in the location of the Global Navigation and the Global Navigation is hidden. This is a perfect layout to use when you wish to have only one set of navigation and would prefer to have more white space on your site to display content.

15


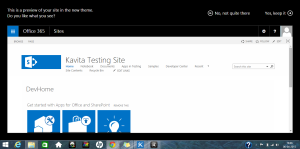
Click on “Try it out” it will show the preview and then “Yes Keep it”.

16


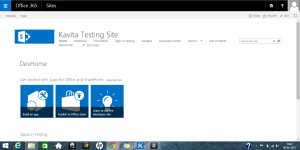
Here is the final view of the site after applying Oslo layout (left side navigation in the location of the Global Navigation and the Global Navigation is hidden). 🙂

17

Creating a Sharepoint 2013 List from an Excel-sheet


In this post I will write about creating a SharePoint list from an excel sheet, Some time you must have come across a situation where your client or manager has an Excel sheet and wants to put it on the SharePoint as a List, We can do that using “Import SpreadSheet App” in SharePoint 2013

The steps are as follows
1. Go to Site Settings -> Add an app, and search for ‘Import Spread Sheet’ app.

1

2

3

4


2. Add ‘Import Spread Sheet’ app and provide information as shown in below screen. You need to select the excel file.

5


3. Click on the import, wait for few seconds and your spreadsheet gets imported in list.

6

Thanks for reading the blog 🙂

Hide the Quick Launch in SharePoint 2013


As we know In SharePoint 2013 the Quick Launch is mandatory but sometime it is useful to ‘turn-off’ the Quick Launch on a specific page but not on the whole site. In these cases we can use a Script Editor Web part in SharePoint 2013.


Add a Script Editor Web part on the page after clicking on Check-out
-> Edit the page -> Insert -> Script Editor Web-part
1

4

5


Now edit the Script Editor Web-part and Write the following HTML code to hide the quick launch and then Click Insert.

6

7

8

10


So now the Quick Launch will disappear and here is the final view of our page

11


Please note this is good only if you wish to hide the quick launch from one or two pages, if you want to totally remove the Quick launch on your Site then edit your master page.  By default if you haven’t done anything to your SharePoint instance the default master page will be the seattle.master.  Add your codes there and it will disable the quick launch for the whole Team Site.


I hope you find this blog helpful 🙂